Digitizing Optical Disks with ImgBurn
Use this workflow to create preservation copies of optical disks such as CD-ROMs, DVDs, and Blu-ray discs using ImgBurn on Windows.
The ISO image is the preservation copy of the disc contents. The ImgBurn log documents the imaging process. The README records the disc ID, disc type, and label text.

TLDR
For optical disks, photograph the disc label, create an ISO image with ImgBurn, save the ImgBurn log, verify that Windows can open the ISO, eject the mounted ISO, and keep basic documentation with the image.
Minimum required package:
disc010_annual-report_2008/
|-- disc010.iso
|-- ImgBurn.log
|-- README.txt
|-- disc010-label.jpg
+-- sip-manifest.csv
Save all files for initial capture in the root disc folder. Do not create objects/, metadata/, nearline/, or online/ folders during this workflow. That organization happens later during preservation processing.
Scope
This guide is intended for:
- CD-ROM
- CD-R
- CD-RW
- DVD-ROM
- DVD-R / DVD+R
- DVD-RW / DVD+RW
- Blu-ray discs, if compatible equipment is available
Stop if the disc is damaged or unreadable
Do not repeatedly retry damaged, failing, or unreadable discs without supervisor approval. Record the error and ask staff about next steps. Keep a list of any discs that will not read, then give the list and the problem discs to Archives Admin so they can try IsoBuster or other recovery tools.
Required Files
| File | Purpose |
|---|---|
disc010.iso |
Preservation image of the optical disk contents |
ImgBurn.log |
Technical and process metadata from ImgBurn |
README.txt |
Disc ID, disc type, and label text |
disc010-label.jpg |
Photo documentation of the physical disc |
disc-files/ |
File-level copy of the mounted ISO contents for review and access |
sip-manifest.csv |
Manifest of the completed disc package |
If additional labels/artwork:
disc010-sleeve-front.jpg
disc010-sleeve-back.jpg
disc010-case-front.jpg
disc010-case-back.jpg
1. Create the Disc Folder
Create a local folder for the disc using this format:
disc-id_short-title_date/
The first part is the assigned disc ID. Add a short lowercase title and a date or date range so the folder is easy to identify.
Example:
disc010_annual-report_2008/
disc002_newsletters_1997-1999/
Use the same disc ID for files created during this workflow.
Example filenames:
disc010.iso
ImgBurn.log
README.txt
disc010-label.jpg
2. Photograph the Original Disc
Document the top or label side of the optical disc. Use a flatbed scanner if one is available, or take a clear photo with a phone.
If using a phone, email the photo to yourself or transfer it to the workstation another approved way. Save the image in the matching disk folder.
Save it as:
disc010-label.jpg
Replace disc010 with the assigned disc ID for that folder.
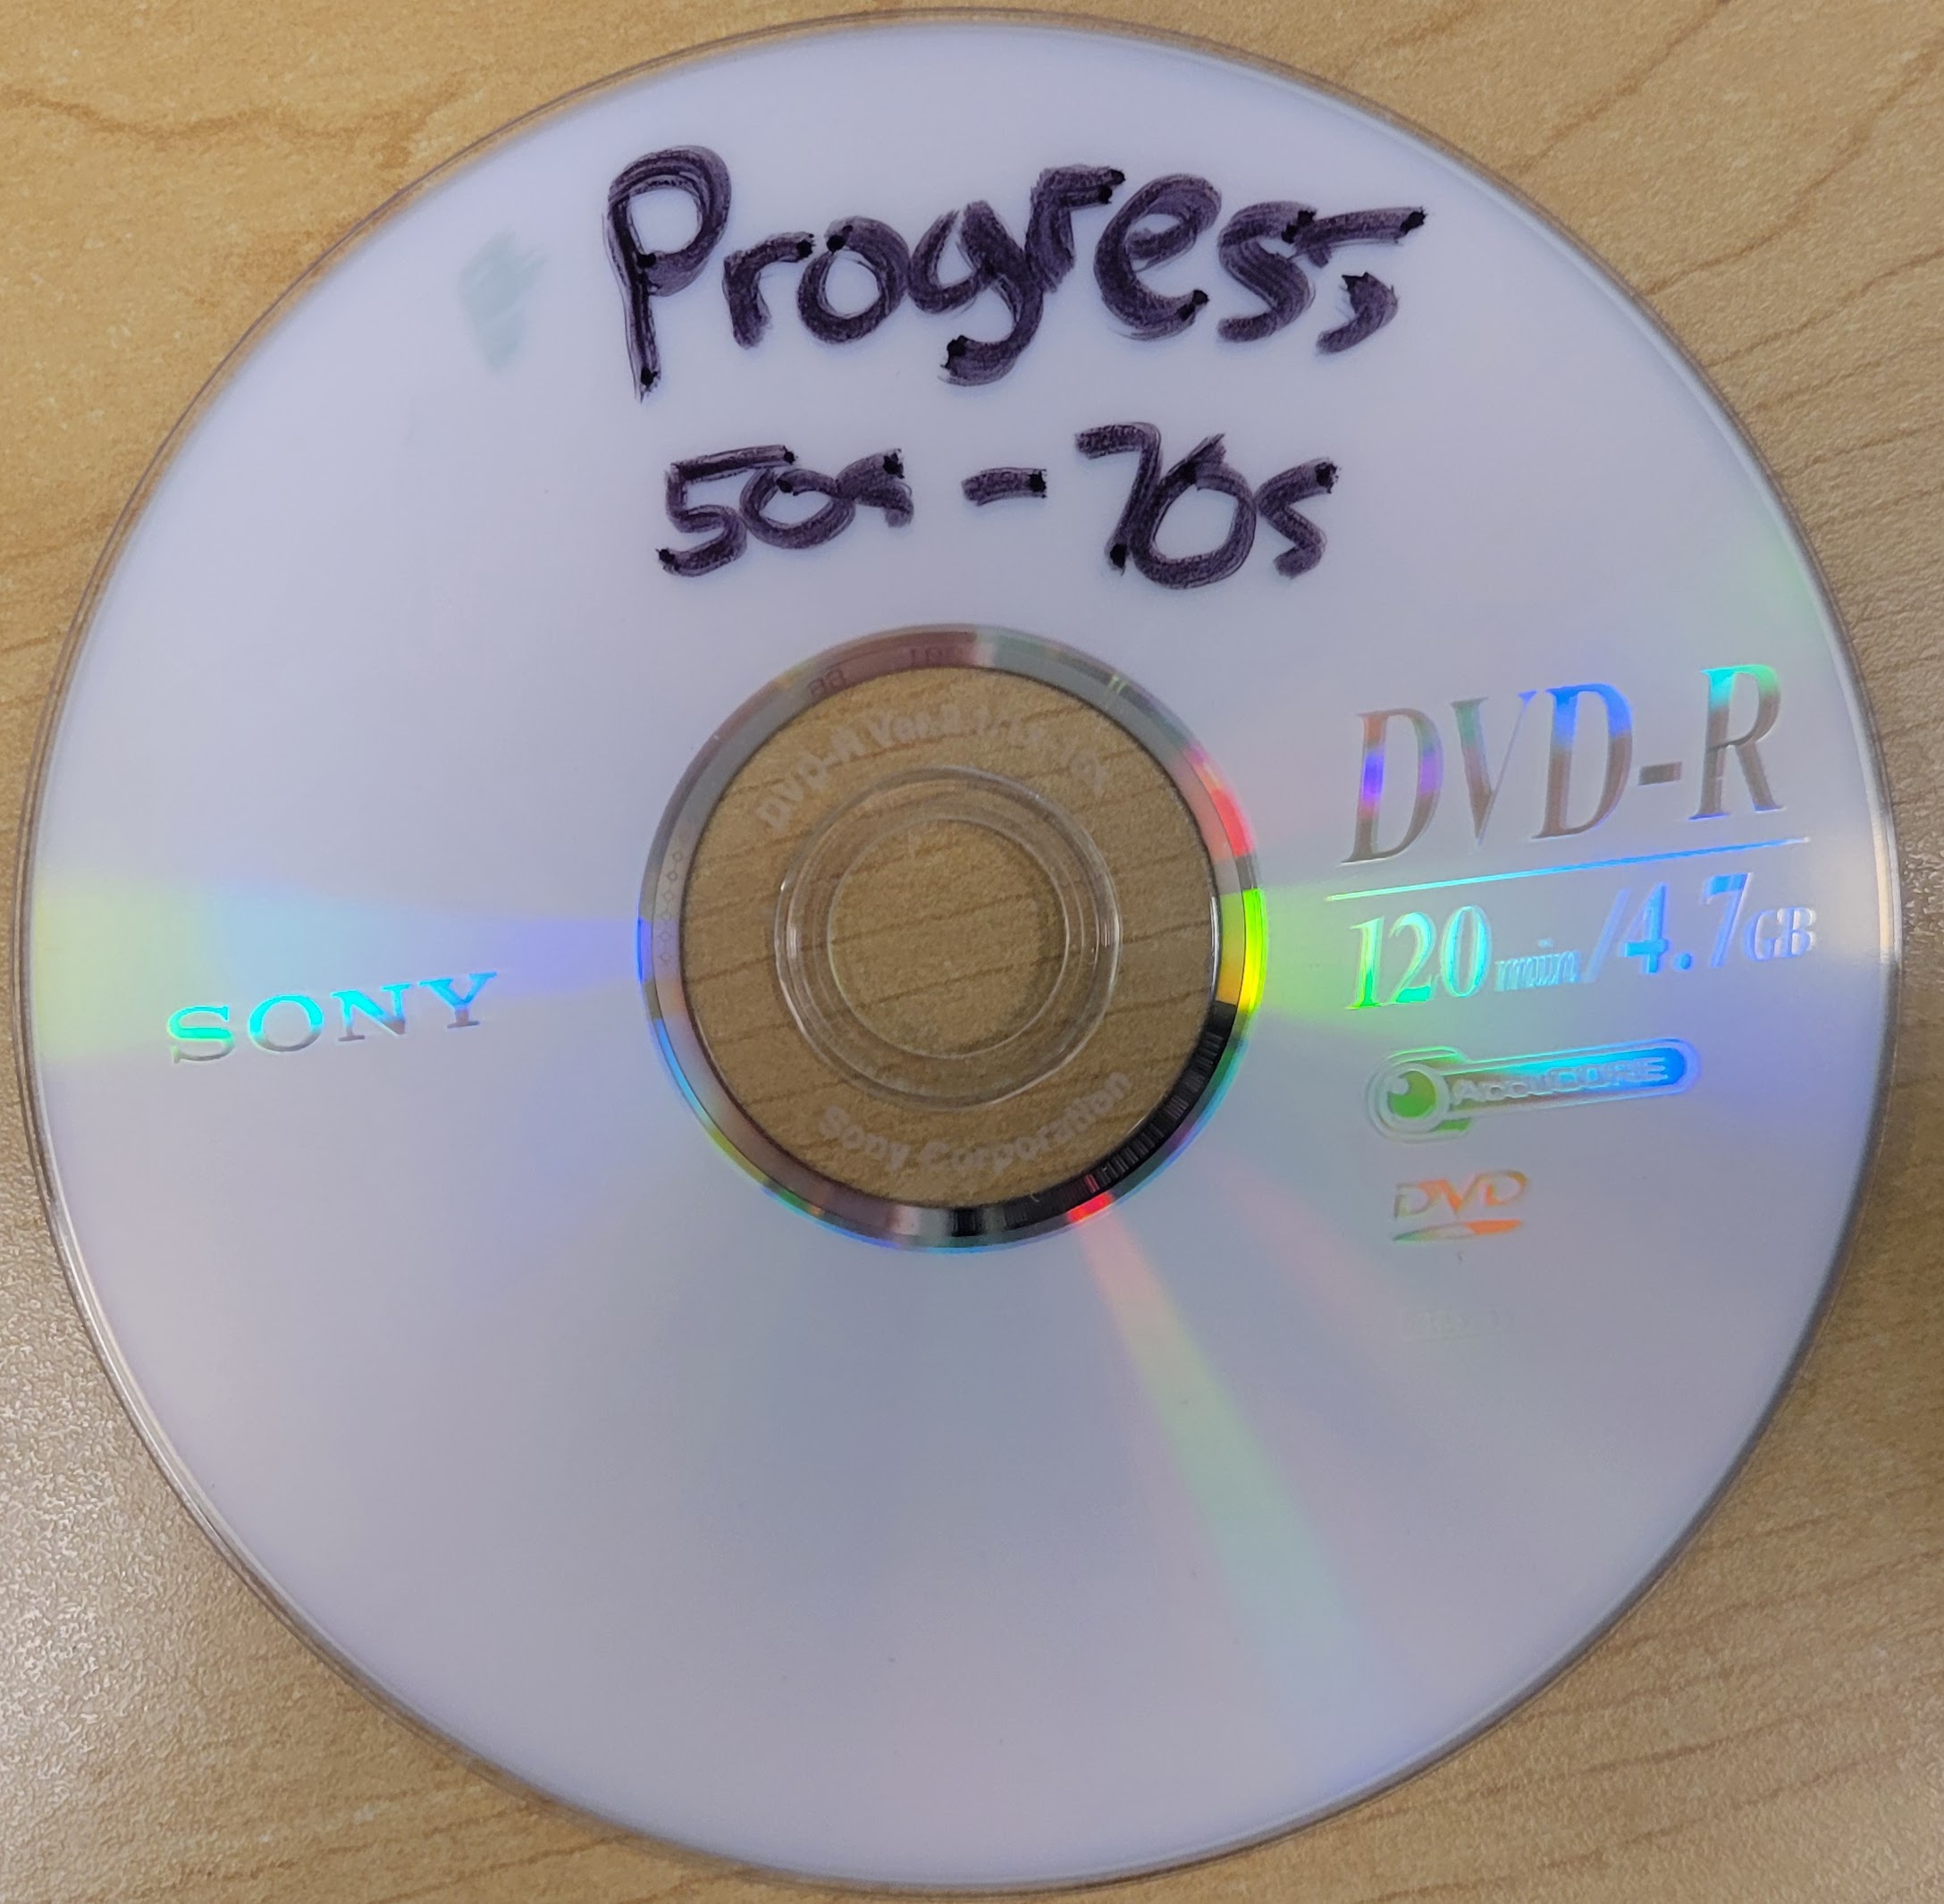
If the disc has a sleeve, case insert, envelope, or handwritten note, photograph those too.
Suggested filenames:
disc010-sleeve-front.jpg
disc010-sleeve-back.jpg
disc010-case-front.jpg
disc010-case-back.jpg
3. Create the README File
Create:
README.txt
Use this template. For Disc type, choose the one option that matches the physical disk. Use Notes for any issues or additional information, including errors, damage, or extra context.
Disc ID:
Disc type: CD-ROM / DVD-ROM / Blu-ray / CD-R / DVD-R / unknown
Disk Label (verbatim):
Notes:
Example:
Disc ID: ua22-4_disc001
Disc type: CD-ROM
Disk Label: Library Dedication, June 5, 1965
Notes: Light scratches on label side; ImgBurn completed without errors.
4. Open ImgBurn
Open ImgBurn from FreeCommander:
Favorite Tools > ImgBurn
Choose:
Create image file from disc
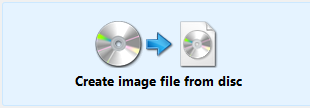
This is the correct mode for creating an ISO from supported optical discs.
5. Select the Source Drive
Under Source, select the optical drive containing the disc.
Confirm that the correct disc appears in ImgBurn before continuing.
6. Set the Destination ISO File
Set the destination path to the disc folder.
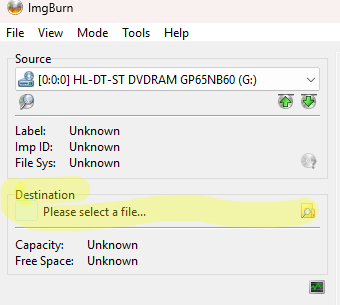
Example:
disc010.iso
When the ImgBurn destination file window opens, change the file type to ISO in the Windows file type drop-down. Save the ISO directly in the root disc folder.

7. Start the Image Creation
Click the large Read button to create the ISO.
Wait for ImgBurn to finish.
If ImgBurn reports errors, warnings, unreadable sectors, or failure, stop and ask staff about next steps. Record staff-approved notes in the README.
Do not keep retrying repeatedly. Add problem discs to the unreadable-disc list and give the list and discs to Archives Admin for recovery attempts with IsoBuster or other tools.
8. Save the ImgBurn Log
Before closing ImgBurn, save the log.
Save it as:
ImgBurn.log
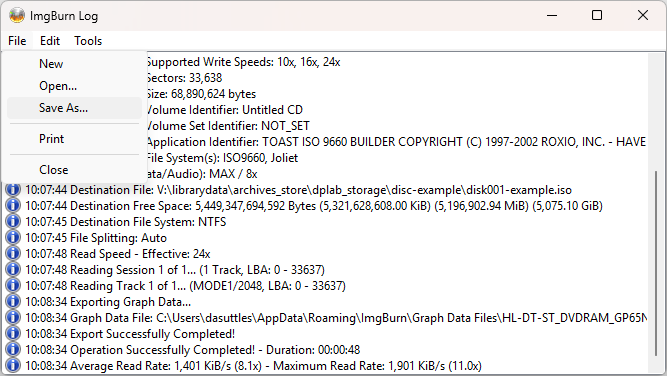
The ImgBurn log is required. It documents the read process, drive, media information, timing, warnings, and errors.
9. Open the ISO in Windows
In File Explorer, double-click:
disc010.iso
Windows should mount it like a virtual disc drive.
Confirm that:
- the ISO opens successfully
- the folder and file structure appears
- the files appear to match the original disc contents
This is a basic access verification. It confirms that Windows can open the ISO and that the expected files are visible.
10. Copy Files and Folders from the ISO
After the ISO has been created and mounted successfully, copy the visible files and folders from the mounted ISO into a review folder inside the root disc folder.
Use this folder name:
disc-files
Preserve the original folder structure. Do not rename files during this copy.
11. Compare Against the Original Disc
With the original disc still inserted, compare:
- original disc contents
- mounted ISO contents
- copied
disc-filescontents
Check that:
- top-level folders match
- top-level files match
- obvious expected files are present
- file names look correct
Do not open or edit files unless instructed. This step is only a quick contents check.
12. Eject the Mounted ISO
After checking the ISO, eject it from Windows.
In File Explorer:
- Go to This PC.
- Find the mounted ISO drive.
- Right-click it.
- Choose Eject.
This closes the virtual disc so Windows is no longer using the ISO file.
13. Create the SIP Manifest
Create a SIP manifest after the ISO, copied files, README, log, and label image are in the disc folder.
In FreeCommander, select the disc folder, then run:
Favorite Tools > Digital Preservation Processing > 2. Create SIP Manifest
The tool scans the active directory and saves sip-manifest.csv there.
What SIP means
SIP means Submission Information Package. In digital preservation standards, a SIP is the package of files submitted by a producer or donor to a repository so it can be reviewed, documented, and prepared for preservation. In this workflow, the SIP is the initial capture package for the optical disc: the ISO preservation image, the copied disc-files contents, and the required documentation files before later reorganization or preservation packaging.
Do not create a separate SHA-256 checksum file during this workflow. The SIP manifest records file checksums for the initial capture package.
Check the active FreeCommander pane
In FreeCommander dual-pane view, the active directory is the side that was clicked most recently. Before running the SIP manifest tool, click inside the disc folder pane so the manifest is created for the correct folder.
14. Final Folder Check
Final package should contain at minimum:
disc010.iso
ImgBurn.log
README.txt
disc010-label.jpg
disc-files/
sip-manifest.csv
Stop and Escalate Conditions
Stop and ask a supervisor if any of the following happen:
- ImgBurn cannot read the disc.
- ImgBurn reports read errors or unreadable sectors.
- The disc makes unusual noise in the drive.
- The disc appears physically damaged.
- The ISO cannot be opened by Windows.
- The ISO opens but appears empty when the original disc is not empty.
- Files or folders appear obviously missing.
- Windows or ImgBurn behaves unexpectedly.
Do not repeatedly retry damaged or failing discs without supervisor approval.
Preservation Note
The ISO image is the preservation copy of the disc contents. The ImgBurn log is retained as technical and process metadata documenting how the ISO was created. The README and label photograph document the disc ID, disc type, and human-readable label information.