Oral History Processing Workflow
This guide is the staff-facing home for oral history processing workflows. It currently covers file naming standards plus the Vtext and ArchivesSpace portion of the work.
Technical File Processing
File Naming Standards
Use one consistent base filename across the oral history files for the same interview.
- Start with the full local item ID in lowercase, such as
ca-015-003-001. - Follow it with the interviewee name in
last-firstformat. - Use
oral-historyas the work-type segment. - Use the interview date in
YYYY-MM-DDformat. - Add a clear suffix when the file represents a specific derivative such as the transcript or cover page.
Use these filename patterns:
ca-015-003-001_homer-mack_oral-history_2025-07-09a.mp3ca-015-003-001_homer-mack_oral-history_2025-07-09.wavca-015-003-001_homer-mack_oral-history_2025-07-09_transcript.pdfca-015-003-001_homer-mack_oral-history_2025-07-09_cover.docxca-015-003-001_homer-mack_oral-history_2025-07-09_cover.pdf
In this pattern, the MP3 filename uses the trailing a to distinguish the access audio copy from the preservation master WAVE file for the same interview date.
Templates
Remote workers can download the current Word cover-page template here:
Oral Histories to Vtext and ArchivesSpace
Use this section for creating the Vtext item, uploading the interview audio and transcript files, and linking the digital objects in ArchivesSpace.


Goal
Create one Vtext item for each oral history interview that includes:
- an MP3 access file for the recording
- a transcript PDF/A with a cover page
- the required local identifier and UUID fields
- two linked digital objects in ArchivesSpace: one for the audio and one for the transcript
Workflow Overview
| Step | Section | Purpose |
|---|---|---|
| Prep | Before You Start | Confirm the source format, prepare the audio and transcript files, and gather IDs. |
| 1 | Create the Vtext Item and Upload the Audio First | Create the item shell so you can get the UUID and handle, then deposit the MP3. |
| 2 | Finish the Transcript and Upload the Transcript Files | Use the live Vtext item URL and handle to finalize the transcript PDF/A and configure the Vtext bitstreams correctly. |
| 3 | Edit the Vtext Item Metadata and Collection Mapping | Add local identifiers, oral history metadata fields, item mapping, and final provenance. |
| 4 | Create or Update the ArchivesSpace Item Record | Add the item-level archival object under the correct collection or series. |
| 5 | Add the Audio Digital Object in ArchivesSpace | Link the MP3 bitstream from Vtext as the first digital object. |
| 6 | Add the Transcript Digital Object in ArchivesSpace | Link the transcript PDF from Vtext as the second digital object. |
Before You Start
- Access to Vtext and ArchivesSpace
- Finalized audio files
- Transcript in editable form so you can finish the cover page and PDF metadata using the Vtext cover page template
- Local item ID or call number
- Correct collection and series location for the interview
Completed example
You can compare your work against a completed oral history item in both systems:
Audio, video, and disk-source oral histories
This workflow is written for oral histories that will be represented in Vtext by an audio file and transcript. Keep the preservation master audio as WAVE when available, and create an MP3 access copy for Vtext. If the source arrives on CD-ROM or DVD, begin with Digitizing Optical Disks. If the interview is video-based, keep the transcript workflow here, but use local video publishing instructions before linking the access video from ArchivesSpace.
Transcript expectations
All oral histories should have transcripts. When possible, include speaker names and time stamps. The final transcript should be saved as a PDF/A for access.
Software and DPLAB access
Some parts of this workflow require local software or DPLAB-only tools. Staff need Microsoft Word to create the cover page with the Vtext cover page template, or LibreOffice Writer as a free alternative if Word is not available. Staff also need Adobe Acrobat Pro to add the cover page and save the final transcript as PDF/A, and the DPLAB processing scripts on DPLAB computers to generate the checksum for the final PDF/A transcript with cover page and to update the Vtext provenance data.
If you do not have access to those tools, for example while working remotely, skip that part of the process for now. Complete everything else you can, finish the cover page in its .docx form, and keep a list of completed item names and Vtext item URLs to send to Archives admin so those cover-page, PDF/A, checksum, and provenance updates can be completed later.
1. Create the Vtext Item and Upload the Audio First
Create the Vtext item before finalizing the transcript cover page. You need the live item URL, UUID, and handle for the transcript citation.
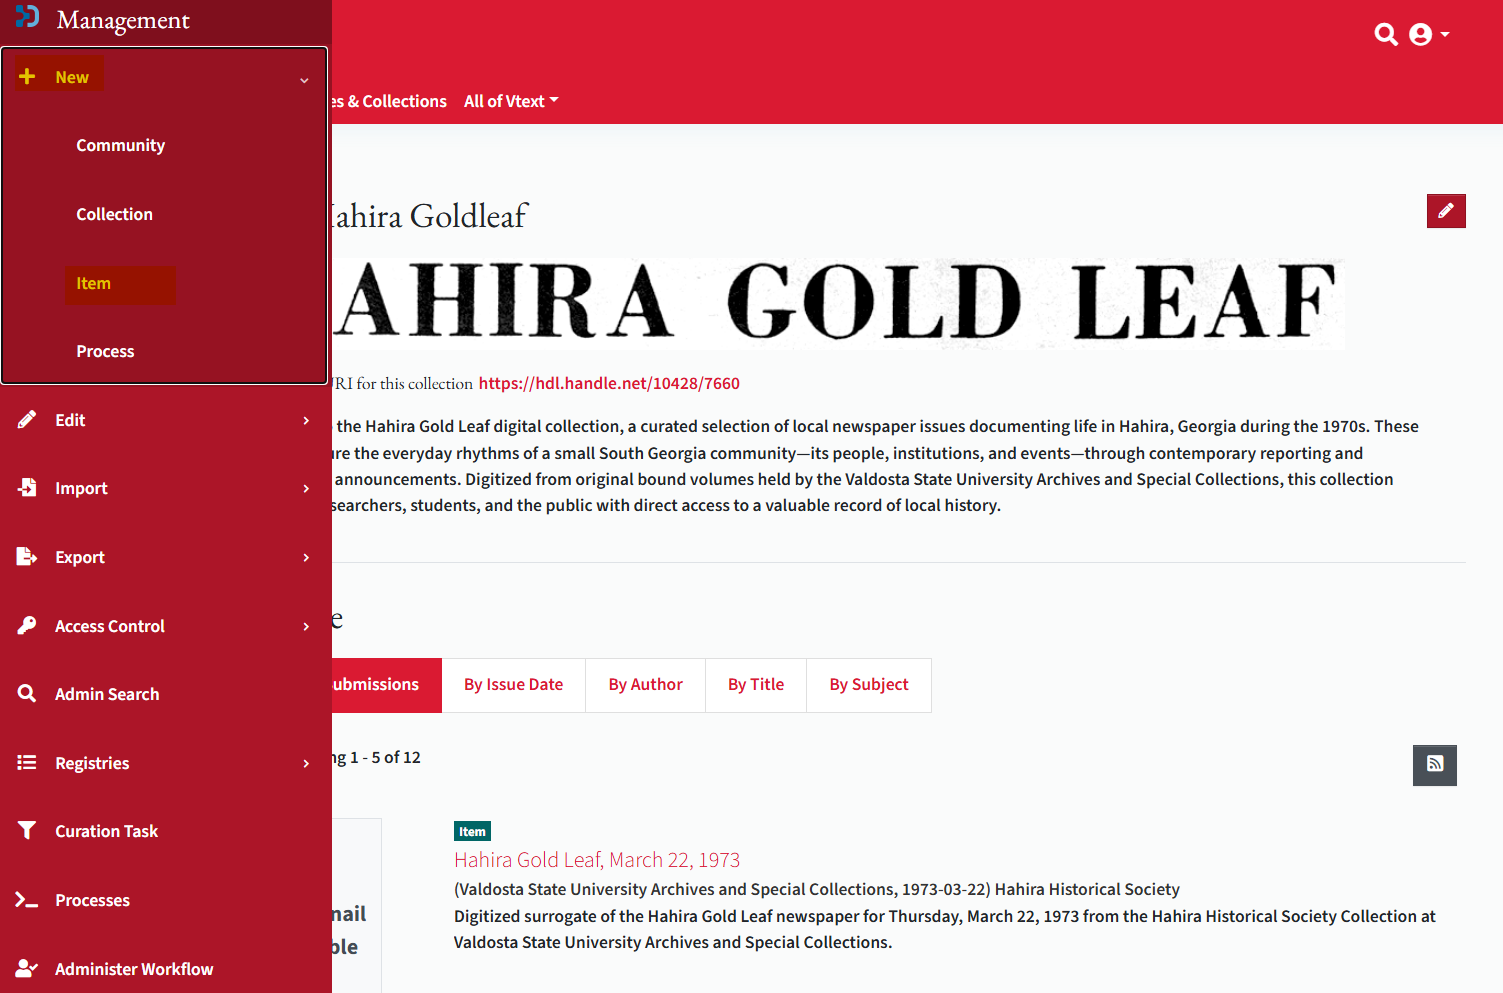
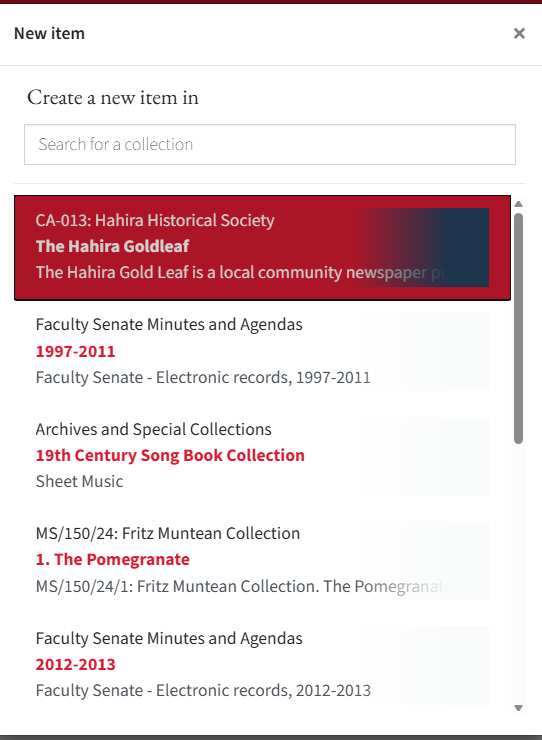
Start the New Item
- Navigate to the correct collection or series in Vtext.
- In the left sidebar, select Create New Item.
- Confirm you are creating the oral history in the correct parent location before entering metadata.
Fill Out the New Item Form
Complete the item form carefully before deposit. The default Vtext deposit form already includes these fields:
| Default form field | What to enter | Notes |
|---|---|---|
Author |
Interviewee name | Enter the interviewee as the main creator for the oral history item. |
Title |
Full oral history title | Use the public-facing interview title. |
Other Titles |
Optional alternative title | Leave blank unless the interview has a meaningful alternate title. |
Date of Issue |
Interview date | Enter the interview date. Use year, month, and day when known. |
Publisher |
Valdosta State University Archives and Special Collections, 2026 |
Replace the year with the current year when needed. |
Citation |
Oral history citation | If the handle does not exist yet, create the item shell first and return to update the citation after deposit. |
Series / Report No. |
Local call number in two boxes | First box: series call number such as CA-015-003. Second box: item number such as 001. Whole ID: CA-015-003-001. |
Identifiers |
Leave blank during the first pass | Add only if local policy requires a specific identifier type and value at deposit time. |
Type |
Vtext content type for the item | Choose the type that best fits the oral history item, such as Recording, oral if available. |
Language |
English (United States) |
Use another language value only when the interview is primarily in another language. |
Abstract |
Short summary of the interview | Summarize the major content of the interview. |
UUID |
Leave blank during the first pass | After the item is created, copy the UUID from the Vtext item URL and save it back on the item. |
Local Archives ID |
Leave blank during the first pass | After the item is created, add the full local item ID such as CA-015-003-001. |
Accession Number |
Leave blank unless needed | Only enter this if local policy calls for it. |
Subject |
Controlled subjects for the interview | Add one subject per field entry. Use + Add for additional subjects. |
Description |
Brief file description | Describe the deposited files rather than the interview content itself, for example 1 audio file (MP3) and 1 transcript PDF/A. |
Whenever a field needs more than one value, click + Add and enter each name, place, or other value in its own separate field. Do not combine multiple interviewers, locations, or other repeated values into a single box.
The following oral-history metadata fields are not part of the default deposit form. Add them later in Edit this item > Metadata:
| Metadata field to add later | What to enter |
|---|---|
dc.contributor.other |
Interviewer name. Add each interviewer in a separate field when there is more than one. |
dc.coverage.spatial |
FAST-style place names such as Valdosta (Ga.), Lowndes County (Ga.), Georgia. Add each location in a separate field when there is more than one. |
dc.coverage.temporal |
Date range, decade, or named event covered by the interview. |
dc.format.extent |
Recording length in HH:MM:SS format. |
Citation Format
Use this citation pattern for oral histories:
Homer, M. (2025, July 9). Mack Homer, oral history interview, July 9, 2025 (B. Hamer & N. Tucker, Interviewers) [Oral history interview]. CA-015-003: Oral Histories, CA-015 River Hill Baptist Church Collection, Valdosta State University Archives and Special Collections. https://hdl.handle.net/10428/7669
Replace the interviewee name, date, interviewers, item title, local collection information, and handle URL with the values for the interview you are describing.
| Vtext field | What to enter |
|---|---|
dc.creator |
Interviewee name |
dc.publisher |
Valdosta State University Archives and Special Collections, 2026. Replace the year with the current year when needed. |
dc.type |
Recording, oral |
Fields to Skip During the Initial Deposit
Leave these blank during the first pass unless local policy changes. Add them later by editing the item metadata after the Vtext item page has been created:
IdentifiersUUIDLocal Archives IDAccession Number
Subjects
- Add one subject per field entry.
- Use Add more for additional subjects.
- Search for controlled terms in FAST subject headings that match the people, places, events, and topics covered in the interview.
- Add subject terms that reflect the major topics discussed in the interview rather than minor passing references.
- Default subjects should include:
Oral history- the main location in FAST-style format, such as
Valdosta (Ga.)
File Description
Use the description field to describe the files being deposited rather than the interview content itself.
Example:
1 audio file (MP3) and 1 transcript PDF/A.
Deposit the Audio First
- Upload the MP3 access copy first. If Vtext asks which bundle to use, choose the
ORIGINALbundle. - Confirm permissions and deposit the item.
- After the item exists, continue to the transcript steps below so you can use the live Vtext item URL, UUID, and handle.
2. Finish the Transcript and Upload the Transcript Files
After the item exists in Vtext:
- Open the new item page.
- Copy the UUID from the Vtext item URL.
- Copy the handle from
dc.identifier.uri. - Finish the transcript cover page using that UUID and handle in the Vtext cover page template. If you do not have Acrobat Pro or DPLAB access, complete the cover page as a
.docxfile and send it to Archives admin for final PDF/A and provenance work. - Add the cover page to the transcript PDF.
- Embed the final PDF metadata.
- Save the transcript as PDF/A.
- Upload or replace the transcript PDF/A in the
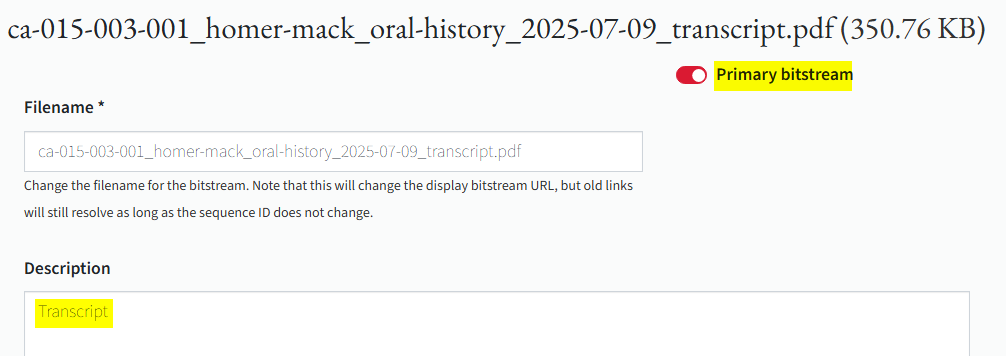
ORIGINALbundle. - Open the item editor, go to Bitstreams, and click Edit on the transcript PDF file.
- Set the transcript PDF Description to
Transcript. - Make the transcript PDF the Primary bitstream.
- In the same Bitstreams area, edit the MP3 file and set its Description to
Access copy.
Bitstream setup
Keep both the MP3 and the transcript PDF/A in the ORIGINAL bundle. The transcript PDF should be the primary bitstream on the Vtext item.
3. Edit the Vtext Item Metadata and Collection Mapping
After all files are present, edit the item and add the required local fields and oral history mapping.
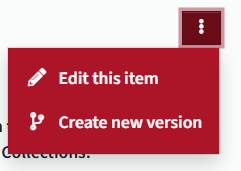
- Open the item page menu and choose Edit this item.
-
In Metadata, add or confirm:
local.identifier.locallocal.identifier.uuiddc.contributor.otherdc.coverage.spatialdc.coverage.temporaldc.format.extent
The
dc.contributor.other,dc.coverage.spatial,dc.coverage.temporal, anddc.format.extentfields are not part of the default Vtext deposit form. Add them here after the item has been created.
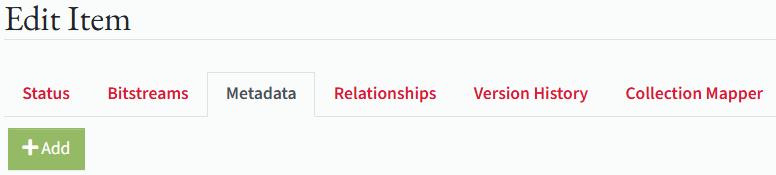
Use + Add whenever any field needs multiple values. For example, add each interviewer in its own dc.contributor.other field and add each location in its own dc.coverage.spatial field.
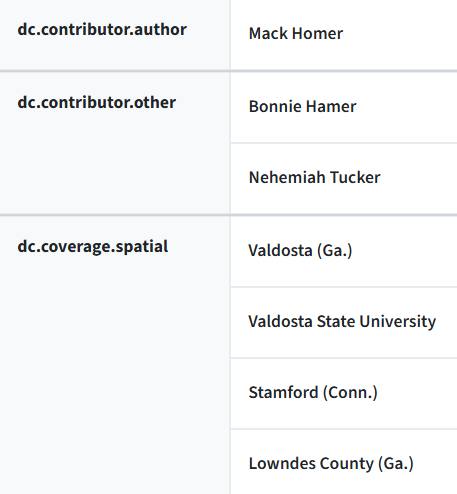
- Save the metadata changes.
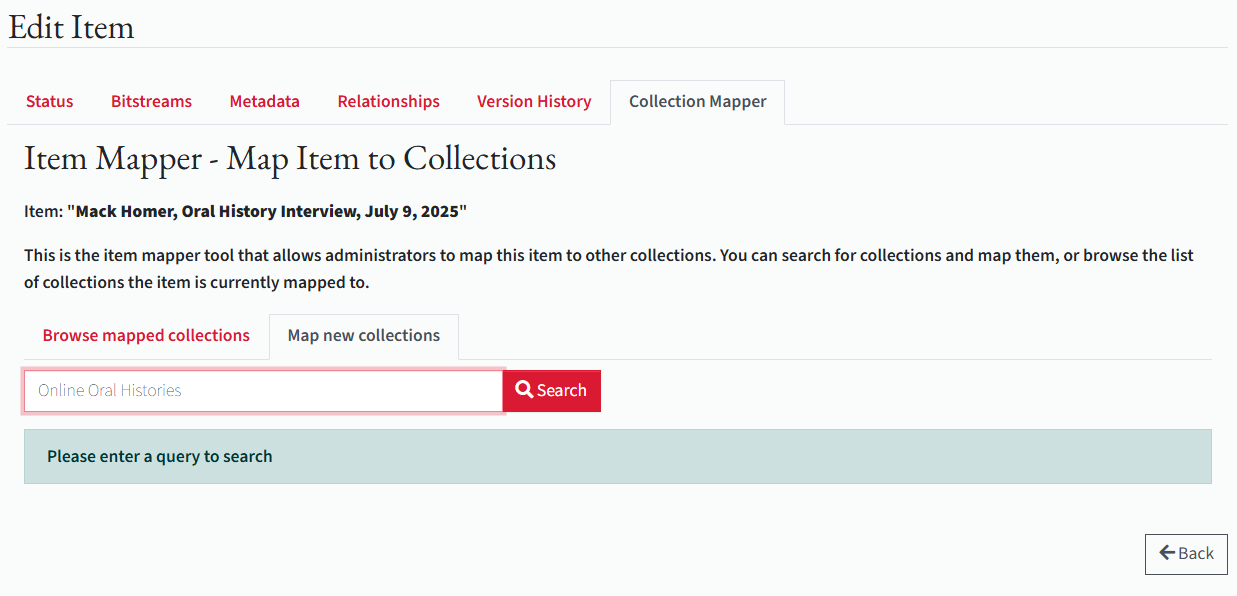
- In Collection Mapper, map the item to Online Oral Histories so it appears in the oral histories record group without duplicating the item.
- After the MP3 and transcript PDF are both uploaded, update the
dc.description.provenancefields so the final file sizes and checksums match the deposited files.
Provenance updates
Run the local DPLAB provenance script after the final upload so the provenance statement reflects the correct bitstream count, file sizes, and checksums. Copy the finished values back into the Vtext item metadata.
4. Create or Update the ArchivesSpace Item Record
Each oral history interview should have its own item-level archival object in ArchivesSpace.
- Log in to the ArchivesSpace staff interface.
- Make sure you are in the correct repository before searching for the collection or series.
- Use Valdosta State University Archives and Special Collections or Community Archives, depending on where the oral history belongs.
- If you are not seeing the collection you expect, switch repositories first and then search again.
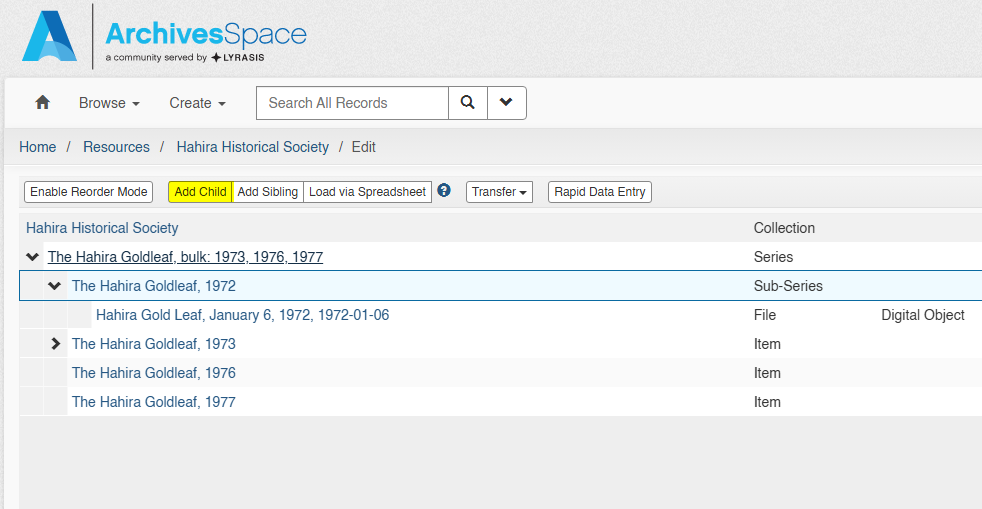
- Navigate to the correct collection and series.
- Create or edit the item-level archival object for the interview.
- Enter the descriptive metadata using the Vtext item as the source.
- Add a note to the ArchivesSpace record:
- Note Type: Processing Note
- Content:
UUID: <item uuid>
- Add the Vtext handle URL to External Documents if it is not already present.
Do not guess when the collection structure is unclear
If the interview does not already have a clear collection or series location in ArchivesSpace, stop and confirm the correct placement with Archives staff before creating a new record.
For the full descriptive field mapping, reuse the established Vtext to ArchivesSpace Workflow and apply the oral-history-specific metadata above for interviewee, interviewer, places, topics, and recording length.
5. Add the Audio Digital Object in ArchivesSpace
After the item-level archival object is saved, attach the MP3 as the first digital object.
- Open the item record in ArchivesSpace.
- In Instances, choose Add Digital Object.
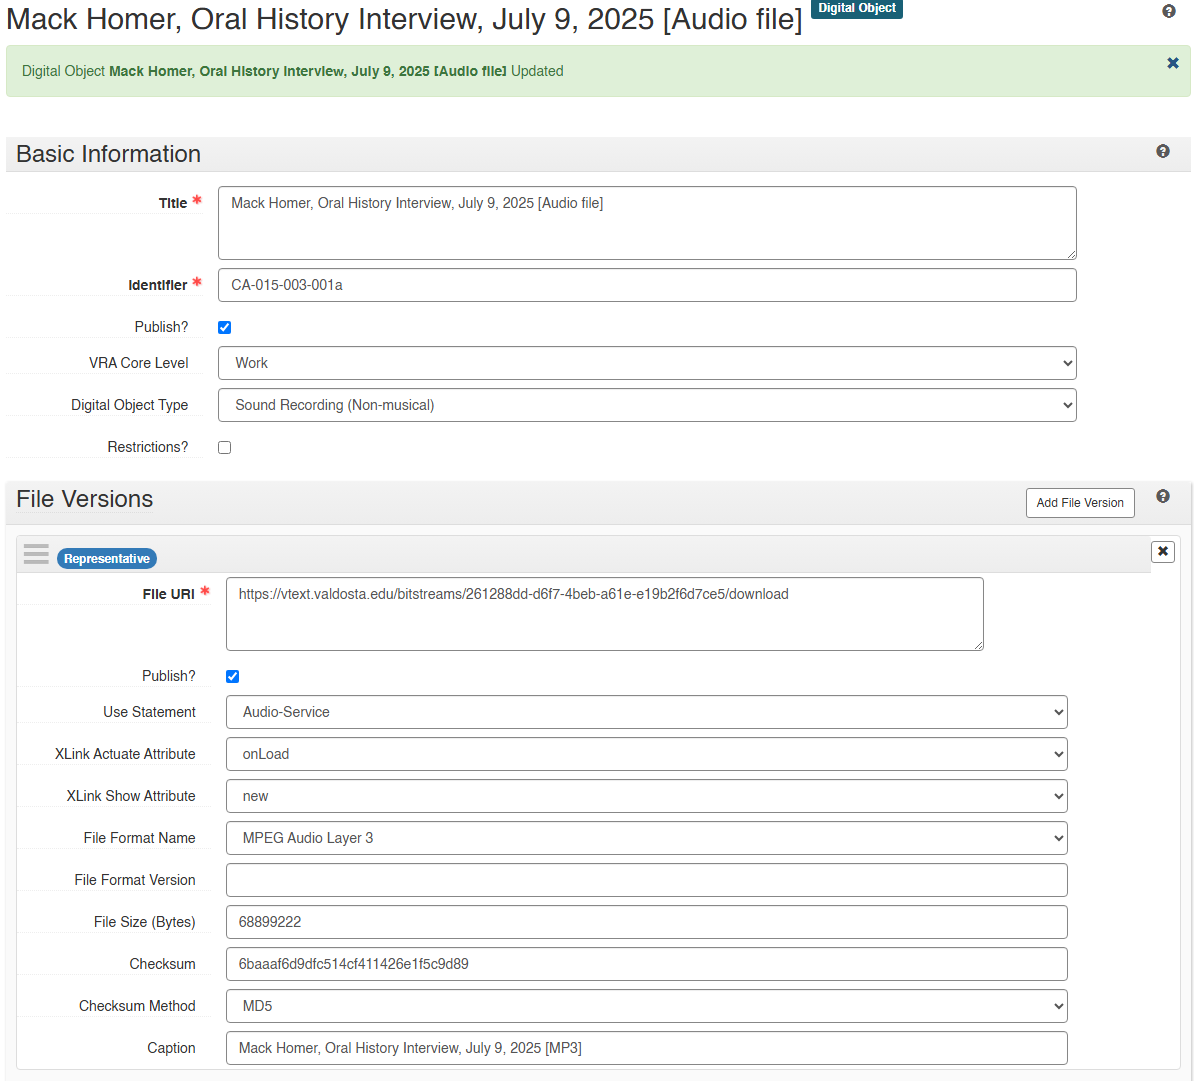
- Fill out the top-level digital object:
- Title: full title with date +
[Audio] - Identifier: local item ID +
asuch asCA-015-003-001a - Publish?: check
- VRA Core Level: Work
- Digital Object Type: Sound Recording (Non-musical)
- Title: full title with date +
- Add one file version:
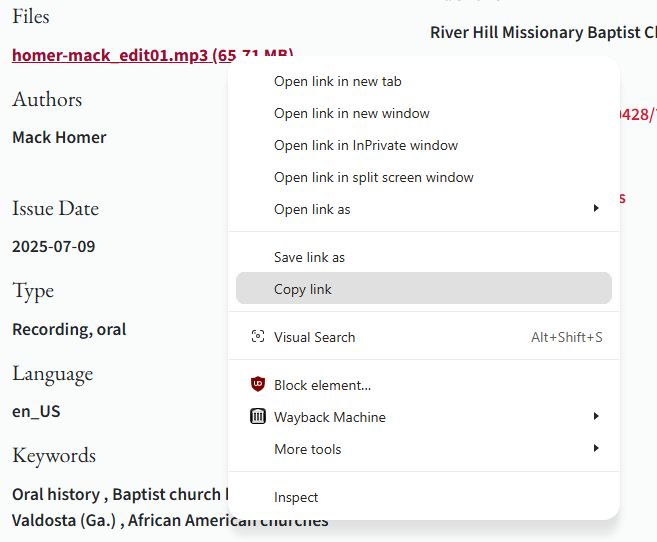
- File URI: copy the MP3 download link from the Vtext item page. See the example below.
- Publish?: check
- Make Representative: check
- Use Statement: Audio-Service
- XLink Actuate: onLoad
- XLink Show: new
- File Format Name: MPEG Audio Layer 3
- File Size (Bytes): copy the MP3 byte count from the Vtext provenance field when available. See the example below. Otherwise, skip this field.
- Checksum: copy the MP3 checksum from the Vtext provenance field when available. See the example below. Otherwise, skip this field.
- Checksum Method: MD5 when a checksum value is entered
- Caption: full title with date +
[MP3]
- Save the digital object.
- After the digital object is linked back to the item record, save the archival object page before moving on.


6. Add the Transcript Digital Object in ArchivesSpace
Return to the same ArchivesSpace item record and add a second digital object for the transcript PDF.
- Add another digital object from the item record.
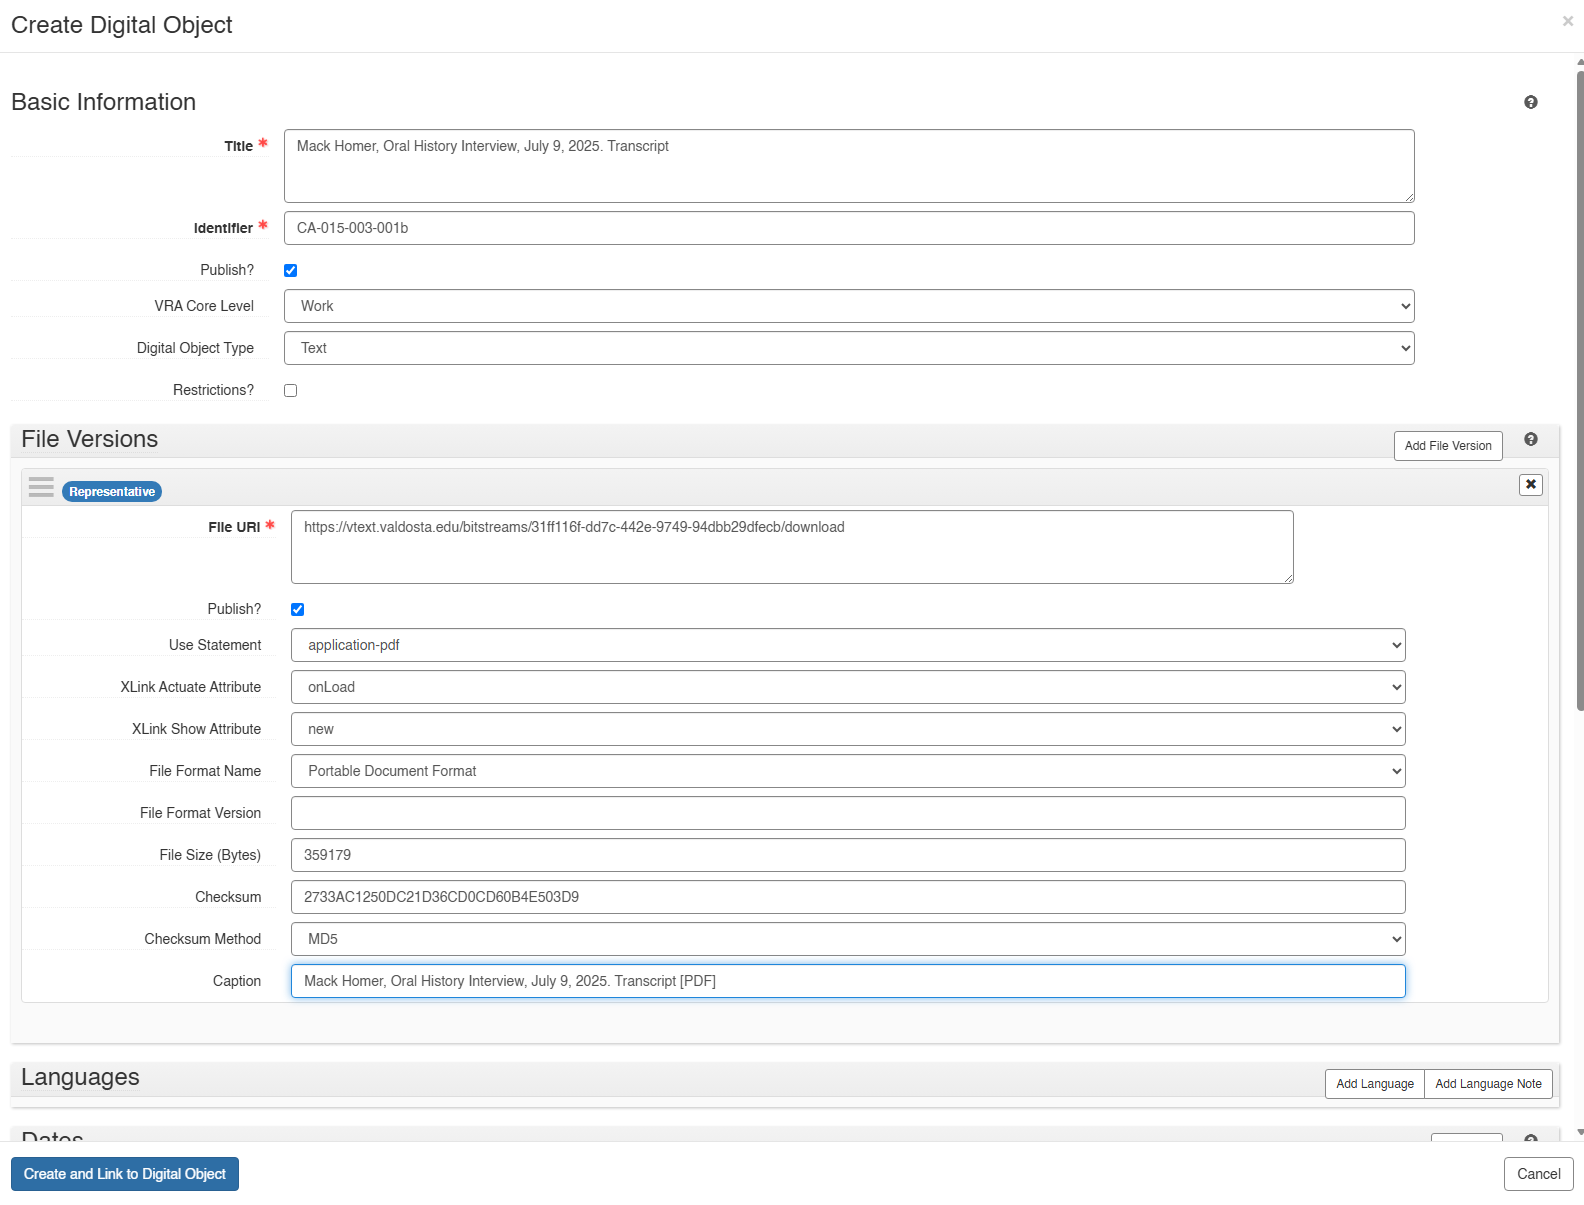
- Fill out the top-level digital object:
- Title: full title with date +
Transcript - Identifier: local item ID +
bsuch asCA-015-003-001b - Publish?: check
- VRA Core Level: Work
- Digital Object Type: Text
- Title: full title with date +
- Add one file version:
- File URI: copy the transcript PDF download link from the Vtext item page. Reuse the file-link example in the audio section above.
- Publish?: check
- Make Representative: check
- Use Statement: application-pdf
- XLink Actuate: onLoad
- XLink Show: new
- File Format Name: Portable Document Format
- File Size (Bytes): copy the PDF byte count from the Vtext provenance field when available. Reuse the file-size example above. Otherwise, skip this field.
- Checksum: copy the PDF checksum from the Vtext provenance field when available. Reuse the checksum example above. Otherwise, skip this field.
- Checksum Method: MD5 when a checksum value is entered
- Caption: full title with date +
Transcript [PDF]
- Save the digital object.
- After the digital object is linked back to the item record, save the archival object page.
If the item later gains more access files, continue the identifier sequence with c, d, and so on.
Final Checks
- Vtext item contains the MP3 and transcript PDF/A
local.identifier.localandlocal.identifier.uuidare saved in Vtext- oral history coverage and duration fields are present
- the item is mapped to Online Oral Histories
- the provenance fields match the final uploaded files
- the ArchivesSpace record includes
Processing Note > UUID: <item uuid> - the ArchivesSpace item has one audio digital object and one transcript digital object
Next processing step
After this workflow is complete, the next step is digital preservation processing and backup creation for the oral history files. Archives Admin will complete that work or delegate it within DPLAB.