Add Outlook Emails to the Patron Projects Planner Board
Use this workflow when a patron sends a reference request by email and Archives staff need to turn that email into a task on the Patron Projects Planner board.
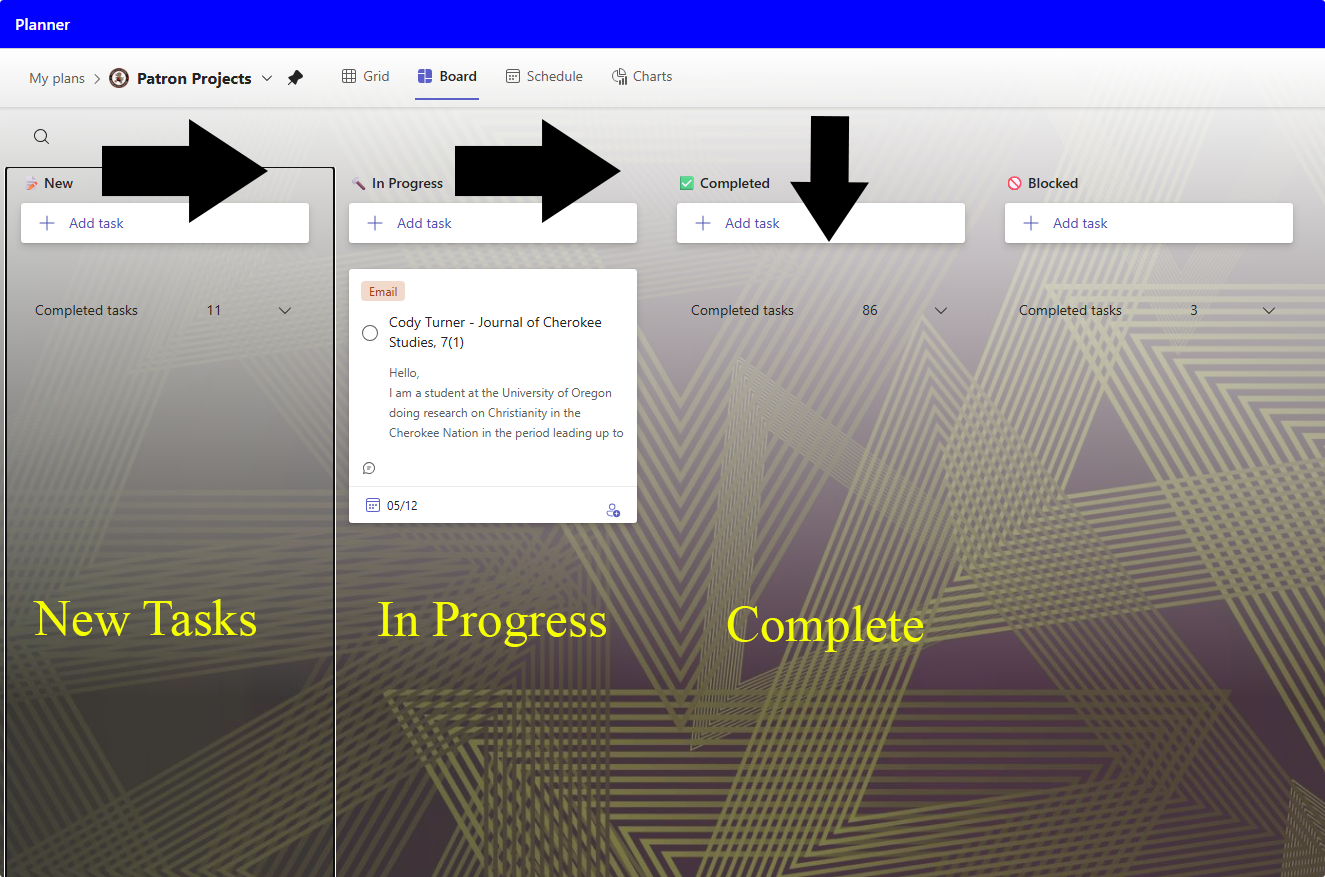
This page follows the Teams-based workflow from the original Archives tutorial: share the email to Teams, create a Planner task from the Teams message, complete the task details, and move the request into the correct bucket for staff or student follow-up.
Teams Setup Basics
Before using this workflow, staff should be able to do the following in Teams:
- sign in to Teams on the workstation
- pin
Tasks by Planner and To Doif needed - open the
Team Archivesteam - find the Planner tab used for
Patron Projects - know where shared reference files live
Posts
Use Teams posts for announcements and coordination only.
If it affects a task, it belongs in Planner, not Posts.
Allowed uses:
- lab-wide announcements
- policy changes
- schedule notices
- system or equipment outage notices
- training reminders
Do not use posts for:
- task progress updates
- completion notices for individual projects
- file-location notes tied to a task
- request-specific questions that belong on a Planner task
Planner
Planner is the source of truth for work status.
Use Planner to record:
- task updates
- file locations
- what is done and not done
- handoffs between staff and student workers
Workflow Overview
This workflow has two parts:
- Send the patron email from Outlook into Teams.
- Turn that Teams message into a task on the
Patron Projectsboard.
After the task is created, it can be assigned, updated, and moved through the normal New, In Progress, Blocked, and Complete workflow.
Step 1. Open the Email in Outlook
In Outlook desktop or Web, open the patron email you need to track.
Use the message actions menu and select Share to Teams.
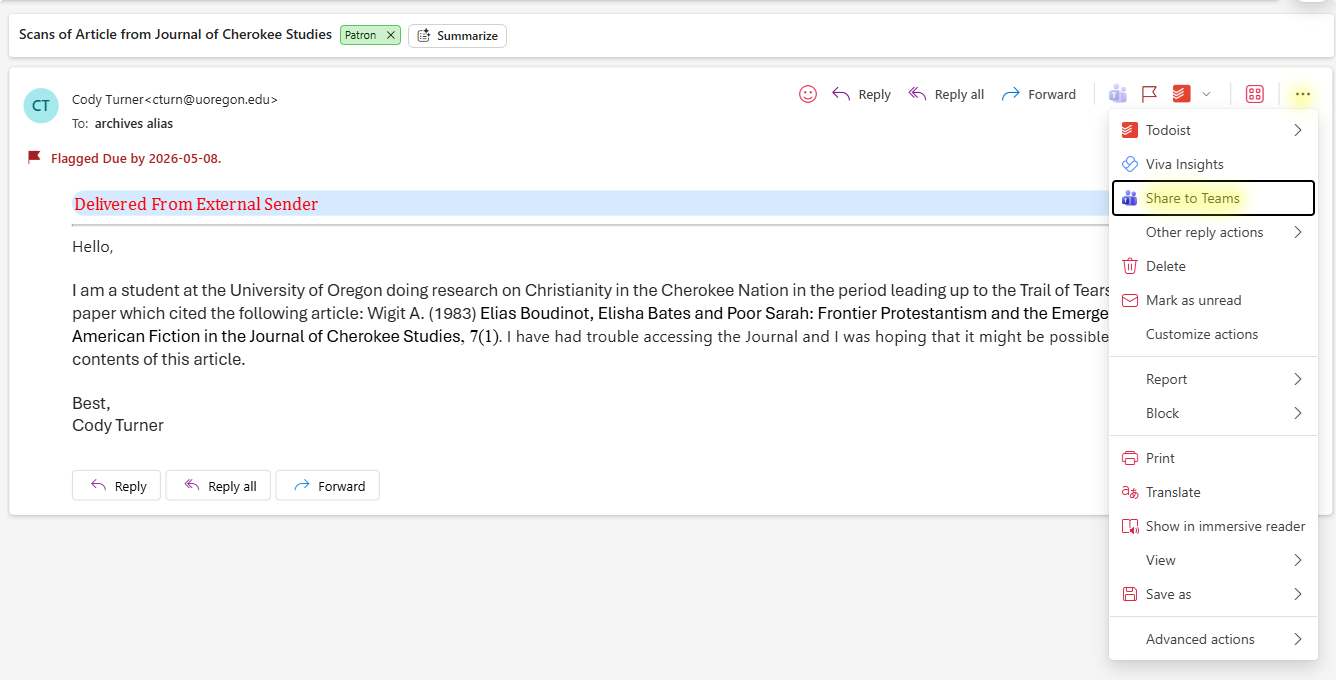
Tip
Copy the original email content to the clipboard before sharing to Teams. This makes it easier to paste the request details into the Planner task later on.
Step 2. Share the Email to Teams
When the Share to Teams window opens:
- Share it to
Team Archives > General. - Confirm the email is going to the correct place.
- Select Share.
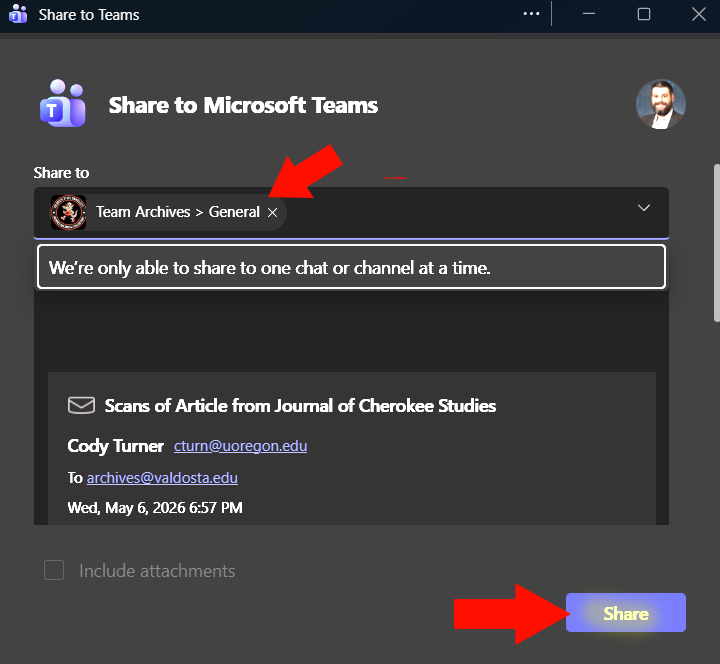
After the share completes, use the Go to Teams link in the popup.

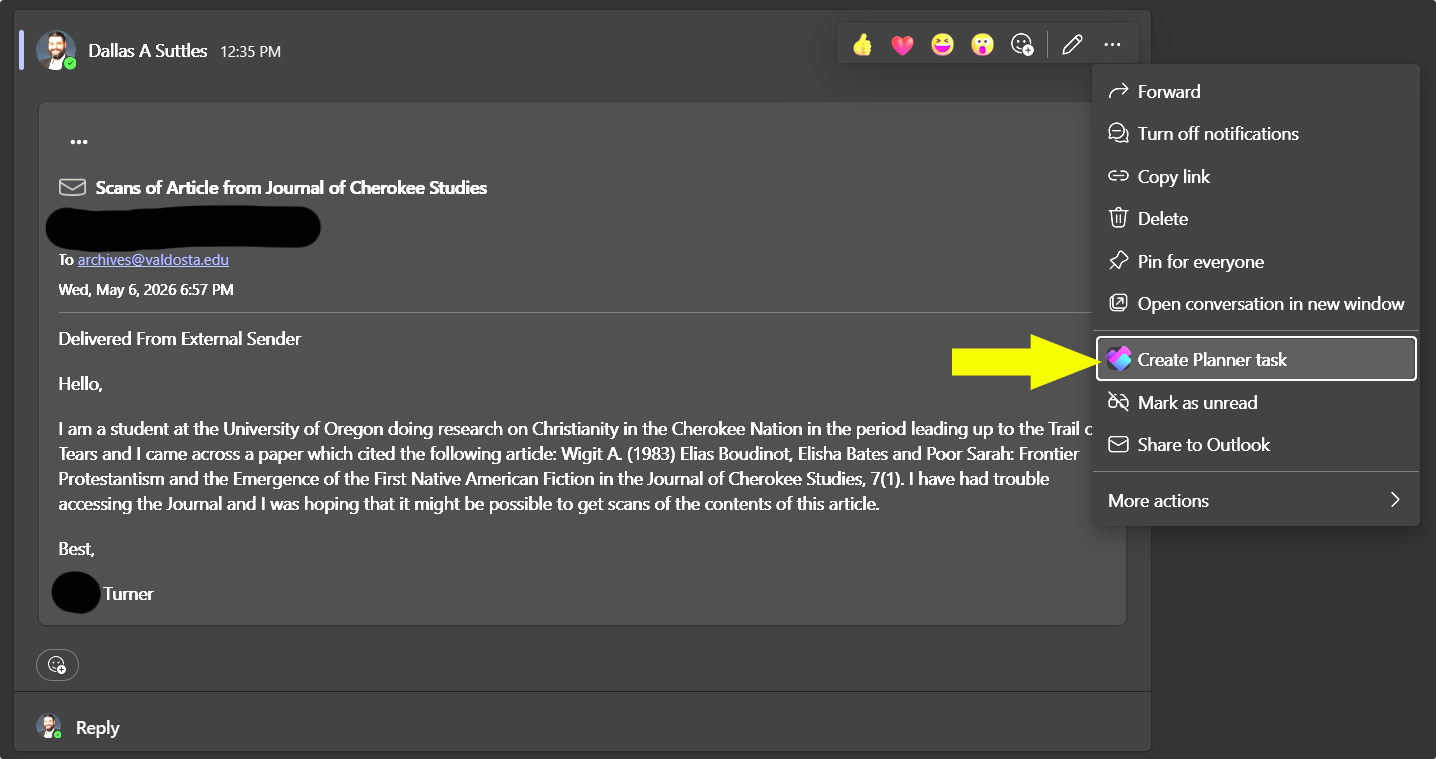
Step 3. Create a Planner Task from the Teams Message
In Teams, open the activity item or post created from the shared email.
Hover over the message, open the more-options menu, and select Create Planner Task.
This is the key handoff point from Outlook into the Patron Projects board.
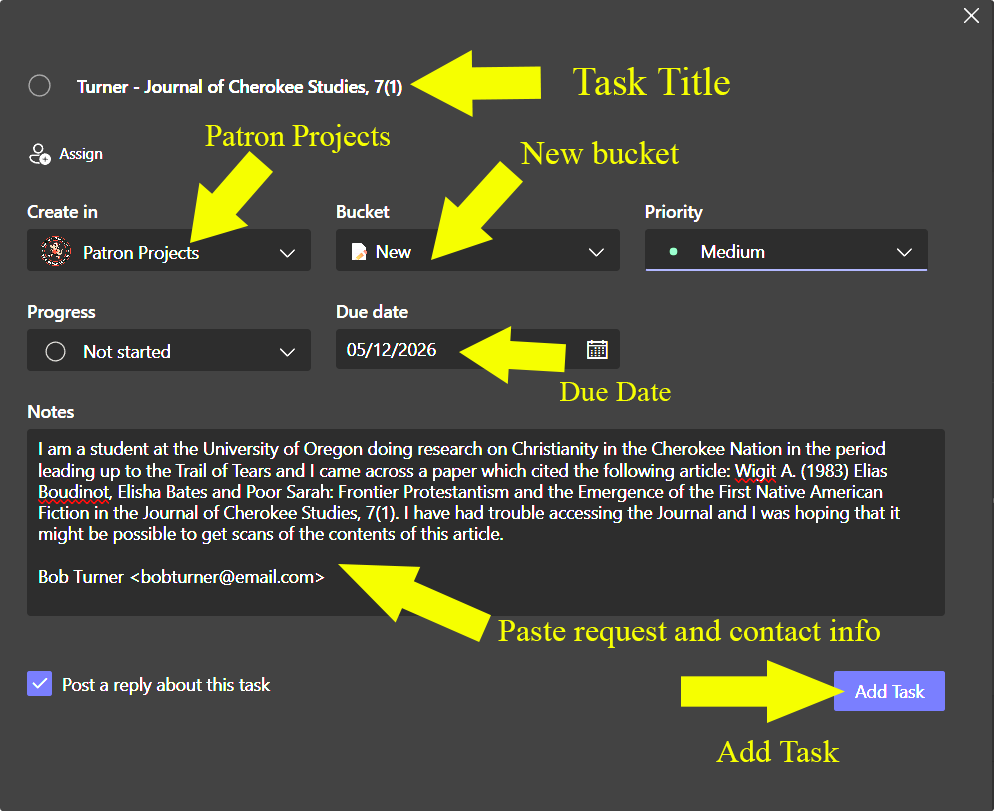
Step 4. Fill Out the Planner Task
In the Planner task popup, enter the required task details:
- Give the task a clear name. Use the patron's name and a brief description of the request. For example: "Smith, John - Request for 1920s photos of campus."
- Create it in
Patron Projects. - Set the bucket to
New. - Leave priority at
Mediumunless the request is more urgent. - Set the due date to three business days from the day of the request.
- Copy and paste the patron request email content into the notes area or comments. You can overwrite the email URL if you want, but make sure the request details are preserved in the task itself. This is important for staff who will work on the request later and may not have access to the original email.
- Include the patron's contact information in the notes or comments.
- Apply the
Emaillabel to indicate the request type. Add any additional labels that are relevant, such asVDT,OBIT, orDEADLINE. - Select Add Task to save it.
Note
Paste full contents of the patron request email into the task notes box. Do not rely on the email URL alone, as it may not be accessible to staff who need to work on the request later. The task itself should contain all the information needed to understand and fulfill the request.
Step 5. Open and Finish the New Task
After the task is created, open it in Planner and finish any additional setup.
Recommended follow-up actions:
- add checklists if the request needs to be broken into smaller steps
- apply relevant labels such as
Email,VDT,OBIT, orDEADLINE - assign the task to the student worker or staff member who will do the work
Note
The original tutorial treats assignment as part of intake. If the responsible worker is already known, assign the task immediately so they receive the notification email.
Step 6. Move the Task into Active Work
Once the task has been assigned, move it from New to In Progress.
The assigned worker is responsible for maintaining the task while it is active. That includes:
- updating task details as needed
- adding and completing checklist items
- attaching related documents or templates when helpful
- posting progress updates in the task comments
If work cannot continue, move the task to Blocked and explain why in the task notes or comments.
Step 7. Complete the Request and Hand It Back to Staff
When the assigned worker finishes the request:
- Move the task to
Complete. - Add a comment stating that the work is complete.
After that, Archives staff can:
- perform a quality-control check
- email the patron
- archive or otherwise close out the task according to local practice
Intake Checklist
- [ ] Patron email opened in Outlook
- [ ] Email shared to
Team Archives > General - [ ] Teams message opened
- [ ]
Create Planner Taskused from the Teams message - [ ] Task created in
Patron Projects - [ ] Bucket set to
New - [ ] Due date set
- [ ] Patron request copied into notes or comments
- [ ] Patron contact information added
- [ ] Relevant labels applied
- [ ] Task assigned when appropriate
- [ ] Task moved to
In Progressonce work begins