Vtext to ArchivesSpace Workflow (Digital Objects)
![]()
This guide describes how to transfer digital objects from Vtext to ArchivesSpace, ensuring metadata consistency and proper linking. Follow each step carefully for each item.
Goal
Transfer digital objects from Vtext to ArchivesSpace, creating a new item-level archival object record for each item and ensuring all metadata is accurately mapped.

Prerequisites
- Access to ArchivesSpace and Vtext (must be logged in to see all metadata fields)
- Vtext metadata spreadsheet for reference
Steps
1. Prepare ArchivesSpace and Vtext
- Log in to ArchivesSpace and Vtext.
- Open Vtext in one browser window and ArchivesSpace in another so you can easily copy/paste information back and forth.
- In Vtext, navigate to the collection item you are working on.
- On the Vtext item page, use Show Full Details to view the complete metadata fields you will map into ArchivesSpace. Later, switch back to the simple item page when you need to copy the PDF file link for the digital object.
- In ArchivesSpace, select the repository and collection you are working in.
- Find the collection and click Edit.
- Select the appropriate series, then choose Add Child or Add Sibling as needed.
- For each item in Vtext, create a new item-level archival object record in ArchivesSpace.
- Use the local unique identifier pattern for the collection you are working in:
UAfor University Archives,MSfor Manuscripts, andCAfor Community Archives. Start with the collection number, then the series number, then the item number (for example,UA-002-001-001,MS-010-003-002, orCA-002-001-001). Increment item numbers in order. If you are not sure which identifier to use, contact Archives admins instead of guessing.
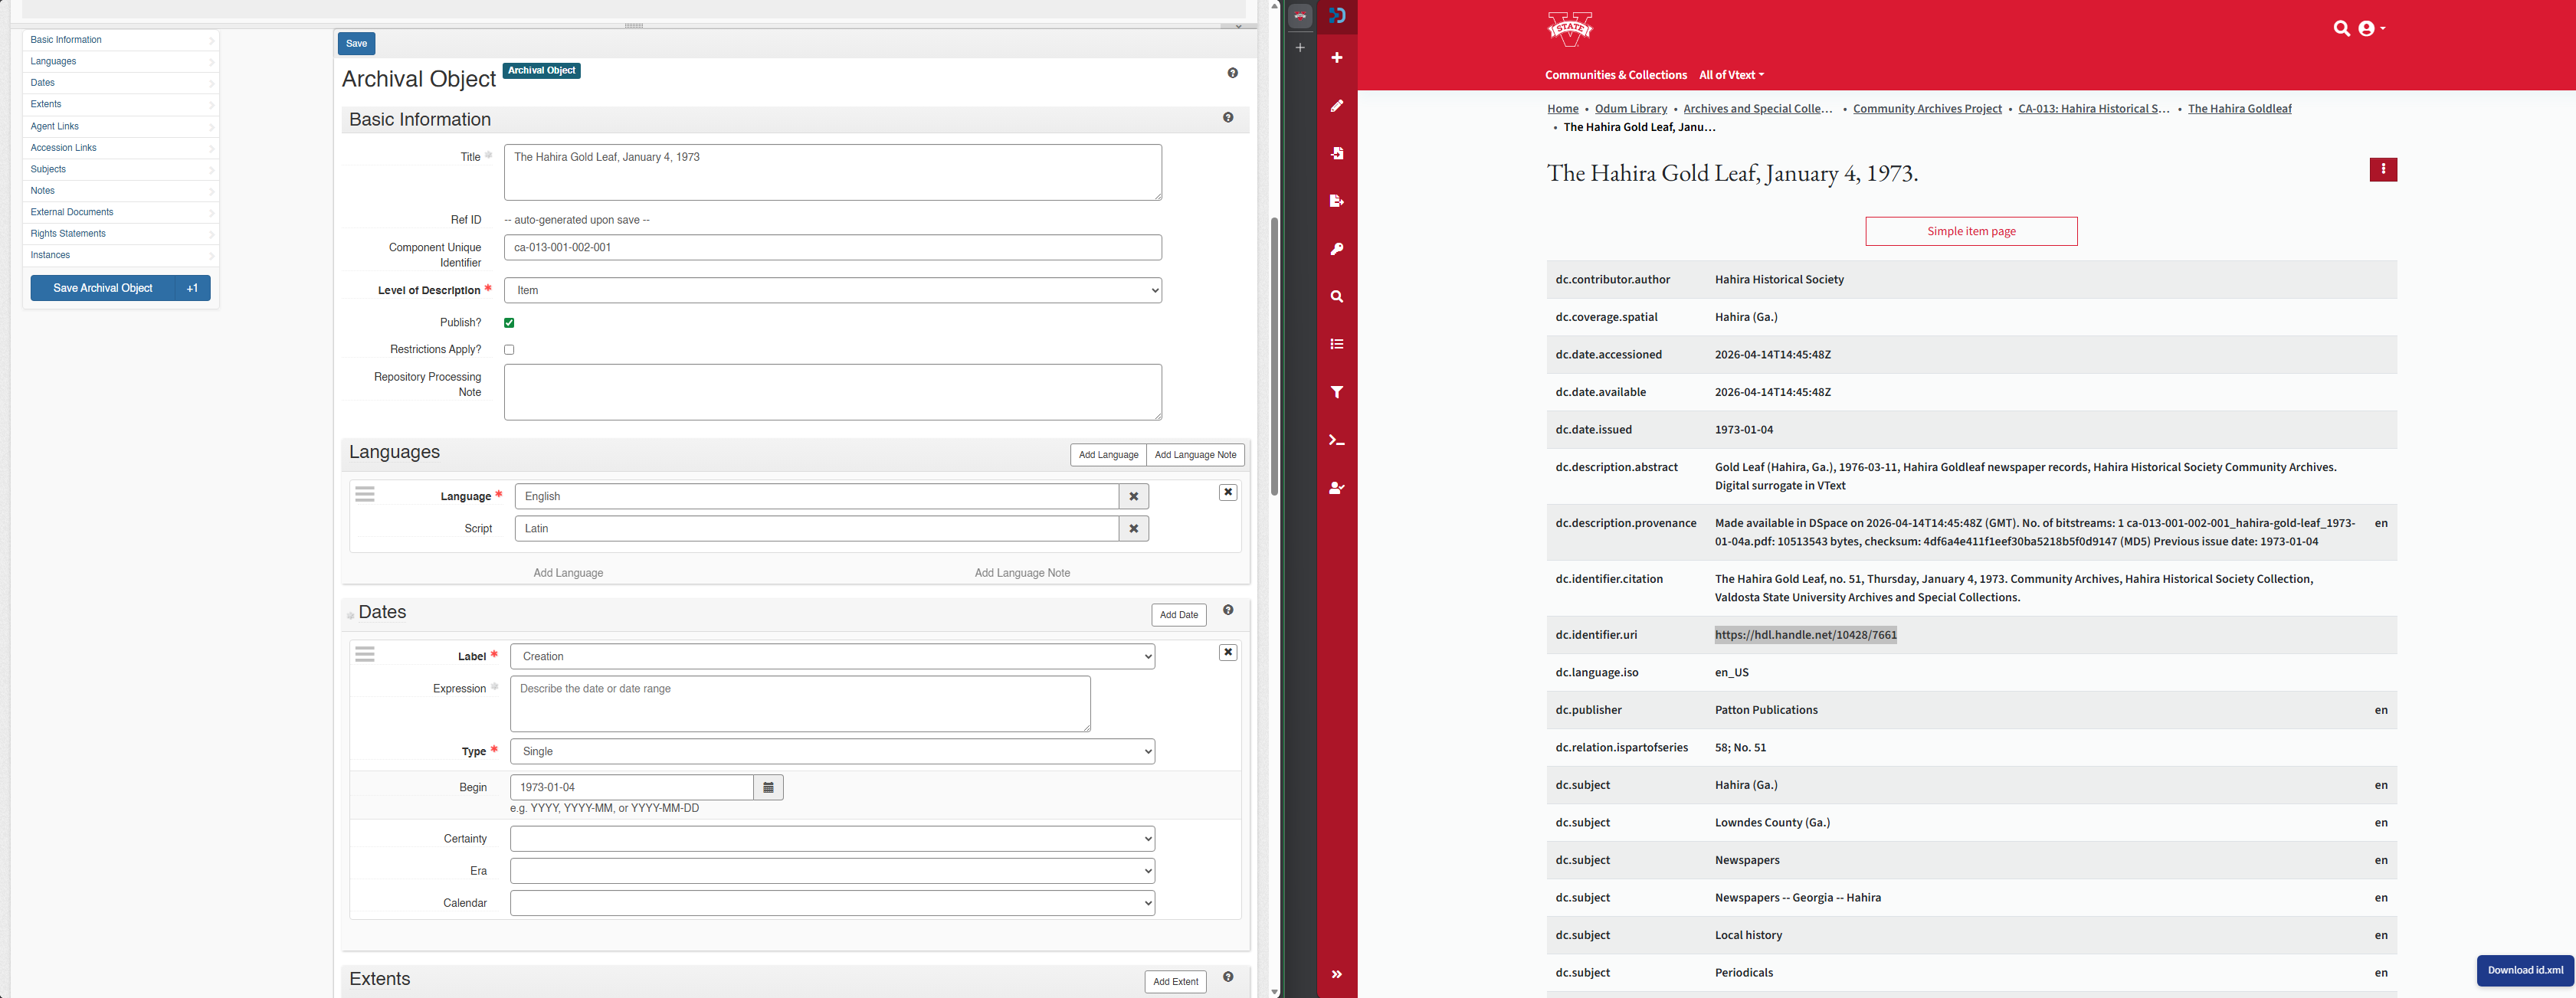


2. Enter Archival Object Metadata
Use the Vtext Full Item Details page as the source for dc.x metadata fields. Enter the descriptive metadata on the ArchivesSpace item record (the archival object page). After that, attach a digital object to that item record, but only fill in the digital object title/identifier and file information so you do not duplicate the descriptive metadata in both places.
Required Fields
- Title: Unique ID +
dc.titlefrom the Vtext Full Item Details page (e.g., CA-002-001-001: Ochlocknee Missionary Baptist Church) - Component Unique Identifier: Collection Number, Series Number, and Item Number
- Level of Description: Item
- Publish?: Check
Vtext to ArchivesSpace Field Map
| Vtext field | ArchivesSpace field | Notes |
|---|---|---|
dc.title |
Title | Add after the local unique ID on the item record. |
dc.subject |
Subjects | Add as subject headings on the item record. |
dc.description.abstract |
Scope and Contents note | Use on the item record and expand only if needed. |
dc.identifier.uri |
External Documents and Digital Object Identifier | Use the full handle URL in External Documents; use the handle value itself for the Digital Object identifier. |
dc.description |
Extent / Physical Details | Use for format or physical description notes on the item record. |
dc.format.mimetype |
Extent / Physical Details | Pair with dc.description when describing the file format. |
dc.description.provenance |
Extent / File Size | Use for bytes or file-size details where needed. |
dc.creator / dc.contributor.* |
Agent Links | Add creators, contributors, or corporate bodies as agents when present. |
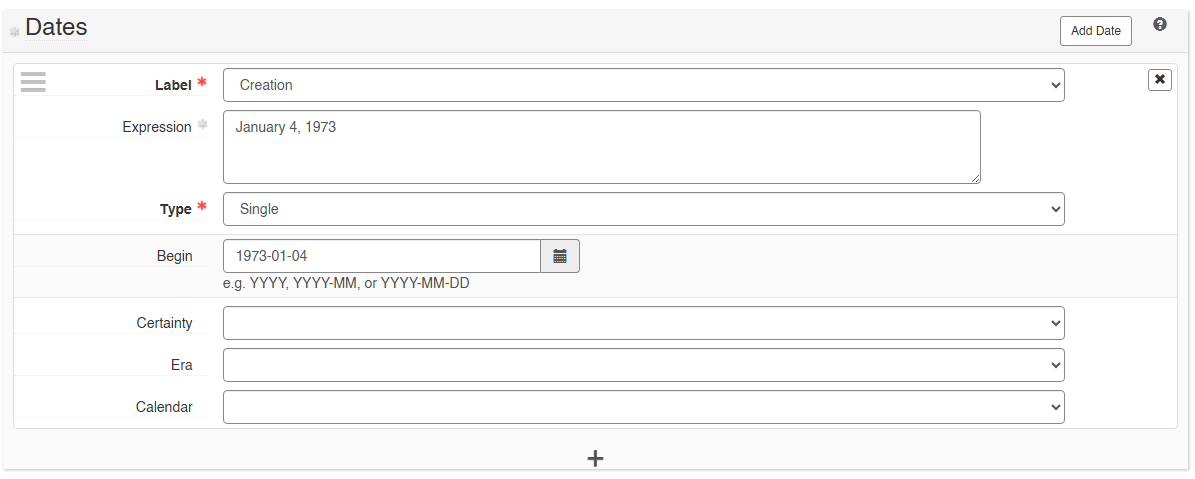
Dates
- Click Add Date
- Label: Creation
- Expression: Type out date (e.g., May 31, 2012)
- Begin: Enter the machine-readable date in ISO format:
YYYY-MM-DD,YYYY-MM, orYYYY, depending on how specific the date is. - Certainty: If estimated, select the best option
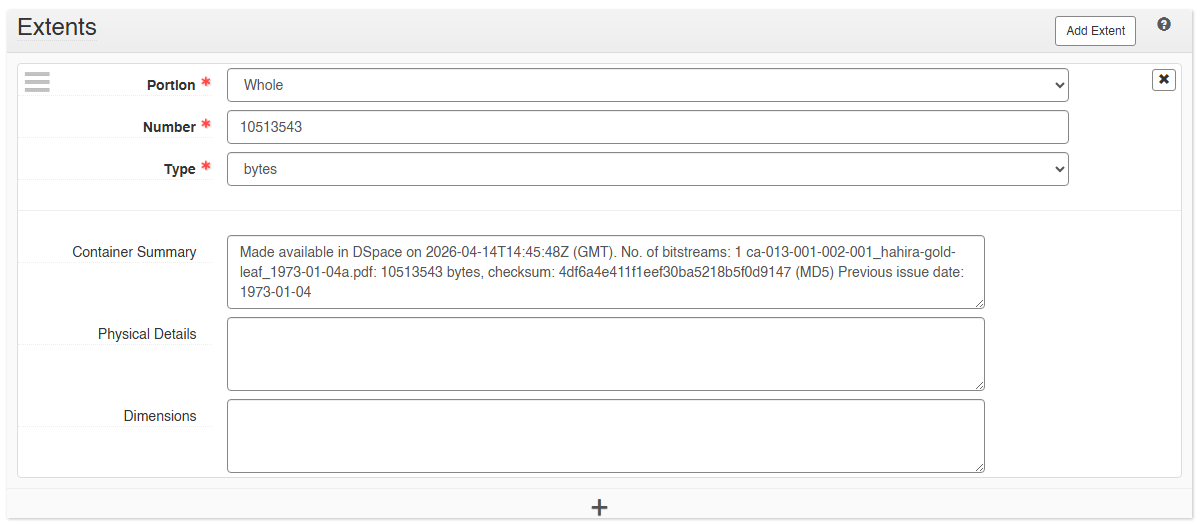
Extents
- Click Add Extent
- Portion: Whole
- Number: Enter bytes from
dc.description.provenance - Container Summary: Made available in Vtext
- Physical Details: Paste
dc.description(e.g., 1 PDF document, 16 scanned images) anddc.format.mimetype(e.g., application/pdf; image/png)
If you cannot see the
dc.description.provenancefield in Vtext, skip the provenance-based details for now. Use Portion = Whole, Number = 1, and Type = Item as placeholders until permissions are updated.

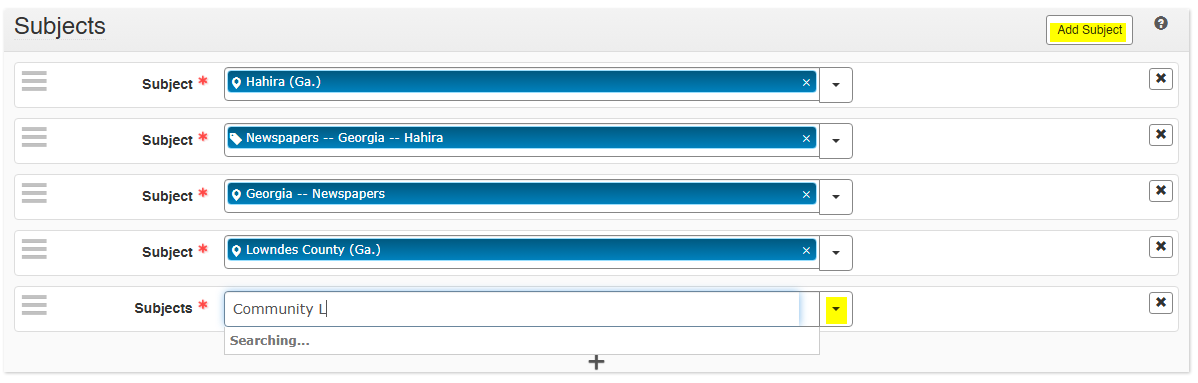
Subject Headings
- Add
dc.subjectfields from Vtext. - Add additional subjects as needed. Check FAST first, then LCSH, since FAST terms are often easier to find and use.
-
Most subject headings will autocomplete. If a subject or subject-agent does not autocomplete or cannot be found, see Appendix: Manual Subjects and Agents.
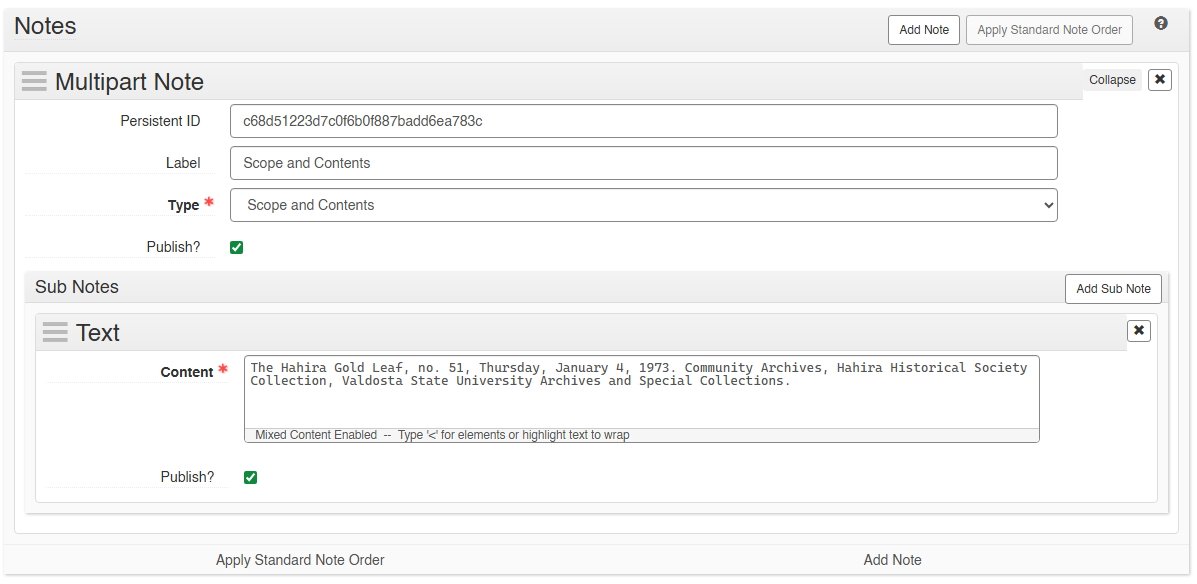
Notes
- Scope and Contents
- Label: Scope and Contents
- Type: Scope and Contents
- Publish? Check
- Content: Paste
dc.description.abstract, fix typos, and add descriptive info as needed (names, dates, etc.).
For guidance on writing scope and content notes, consult the DACS manual.
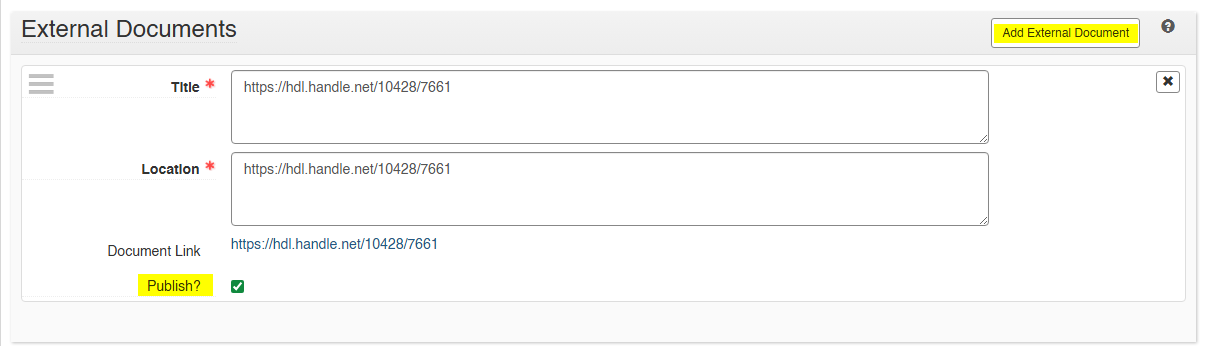
External Documents
- Title: Paste Vtext URL (
dc.identifier.uri) - Location: Paste
dc.identifier.uri - Publish?: Check
3. Save Archival Object
Save your work so far before proceeding.

4. Add Digital Object Instance
At this stage you are attaching the file to the item record you just described. Do not re-enter the full descriptive metadata here. The digital object should only carry the top-level identifier/title plus the file version and access details.
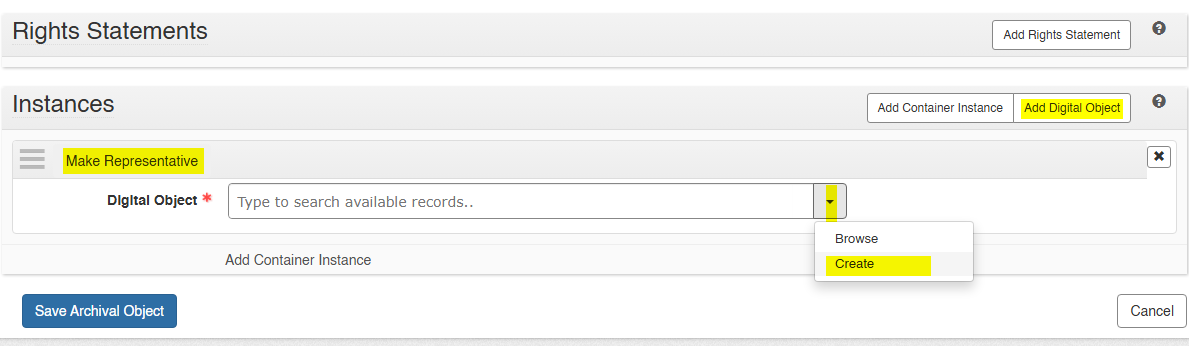
- Scroll to the bottom of the ArchivesSpace item edit page to the Instances section, then click Add Digital Object.
- Check Make Representative
- Click Create
- Title: Use same title as above, but add "[PDF]" (e.g., CA-002-001-001: Ochlocknee Missionary Baptist Church [PDF])
- Identifier: Use the handle from
dc.identifier.uri(for example,10428/7661fromhttps://hdl.handle.net/10428/7661). - Publish?: Check
- VRA Core Level: Work
- Digital Object Type: Text (or Mixed Materials)

File Version
- Click Add File Version
- File URI: On the Vtext simple item page, right-click the PDF file link in Windows 11 and choose Copy link. Paste the full bitstream download URL (for example,
https://vtext.valdosta.edu/bitstreams/a21d9535-ffab-4a0b-98d2-9b272b6567a5/download). - Publish?: Check
- Make Representative: Check
- Use Statement: application-pdf
- XLink Actuate: onLoad
- XLink Show: new
- File Format Name: Portable Document Format
- File Size (Bytes): Paste bytes from
dc.description.provenance(no commas) - Checksum: Enter a real checksum only if one is provided locally.
- Checksum Method: Match the actual checksum you entered, such as
MD5orSHA-256. - Caption: Copy/paste digital object title
- File URI: On the Vtext simple item page, right-click the PDF file link in Windows 11 and choose Copy link. Paste the full bitstream download URL (for example,
- Click Create and Link to Digital Object
- Save Archival Object
Appendix: Manual Subjects and Agents
Use this appendix only when a subject or agent does not already exist in ArchivesSpace and cannot be added through the normal autocomplete/search workflow.
Import Subject Headings
- In the repository drop-down, select Plug-ins > LCNAF Import.
- Search for the subject heading you need.
- Prefer FAST terms when they meet the need. Use LCSH when you need the fuller authorized heading.
- Select the correct record and click Import.
Manually Add Subject Headings
- Click Create Subject.
- Look up the heading in FAST first.
- If needed, confirm or supplement it in LCSH.
- Authority ID: Copy the FAST or LCSH identifier, depending on the source you are using.
- Term: Enter the subject heading.
- Type: Select the appropriate type, usually Topical.
- External Documents: Paste the authority URL in both title and location.
- Save Subject.
Agents Used as Subjects
If the subject is a person, family, or organization rather than a topical term, add it as an Agent Link with the role Subject instead of forcing it into a subject heading field.
- Click Add Agent Link.
- Role: Choose Subject.
- Under Agents, select Create and choose the most appropriate agent type, such as Person, Family, or Corporate Entity.
- Publish?: Check.
- Complete the name form and any identifying details that are available.
Other Agent Links
- Click Add Agent Link.
- Role: Choose Creator, Source, or another appropriate role as needed.
- Under Agents, select Create and choose the most appropriate agent type.
- Publish?: Check.
- Name Forms:
- Source: Local Sources
- Rules: Describing Archives: A Content Standard
- Primary Part of Name: Title of Entity
- Location: Add City/County/State
- Add any other relevant data (dates, URLs, historical/biographical info, etc.)